Pricing Tables are a common element on websites that sell courses, services, packages, deals, etc. There are times when the Pricing Structure is a bit complex and has multiple packages with varied duration. You can create Pricing Tables with Elementor and PowerPack’s Pricing Table Widget.
But, when it comes to creating Pricing Tables with Multiple Durations and Varied Pricing, you can use Content Toggle Widget in combination with the Pricing Table widget.
Creating Variable Pricing Table with Elementor
Before we start, make sure that you have the Elementor as well PowerPack – the Best Elementor Addon installed and activated.
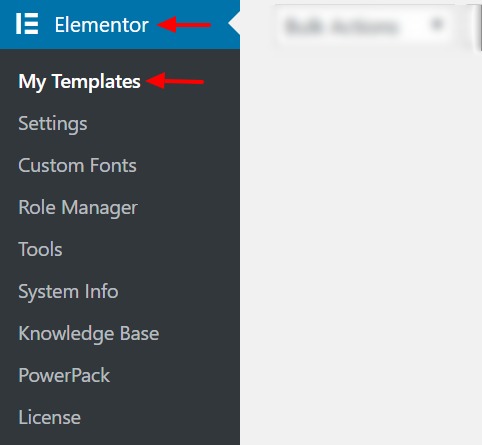
Step 1: Go to WP admin > Elementor > My templates.
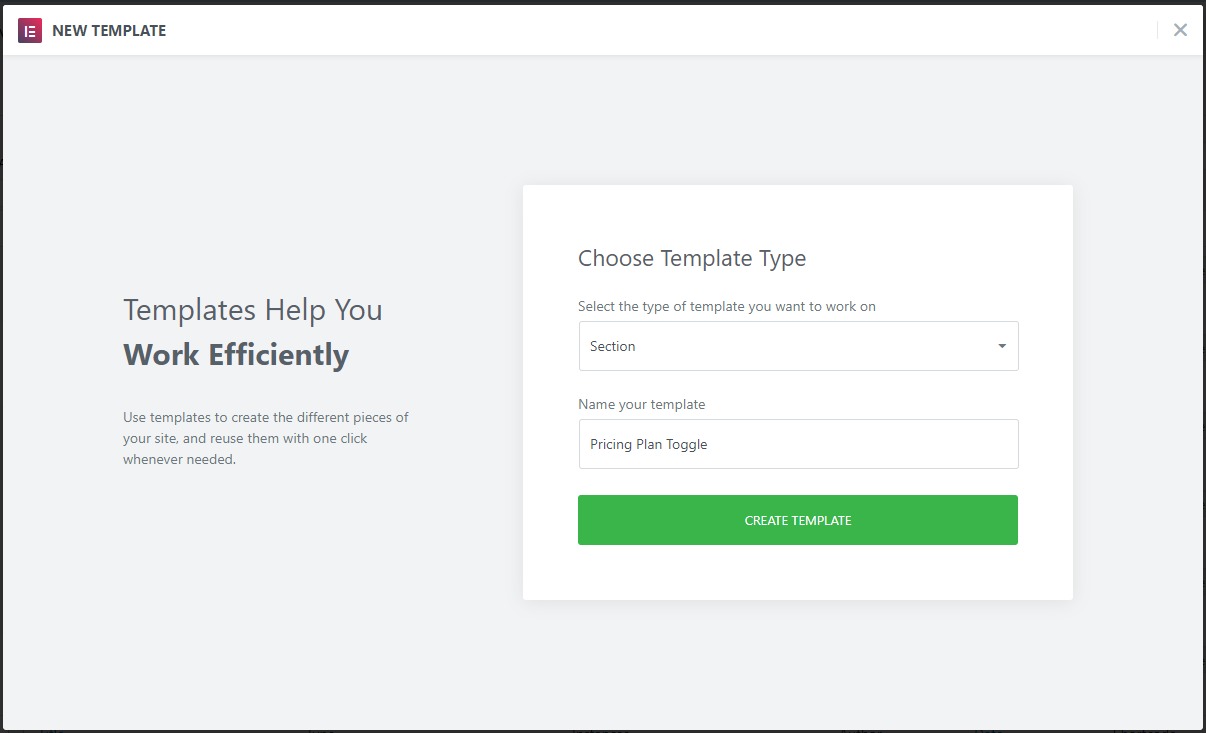
Step 2: Click on the Add New button and select the type of template as Section. Give it a proper name and click on the Create Template button.
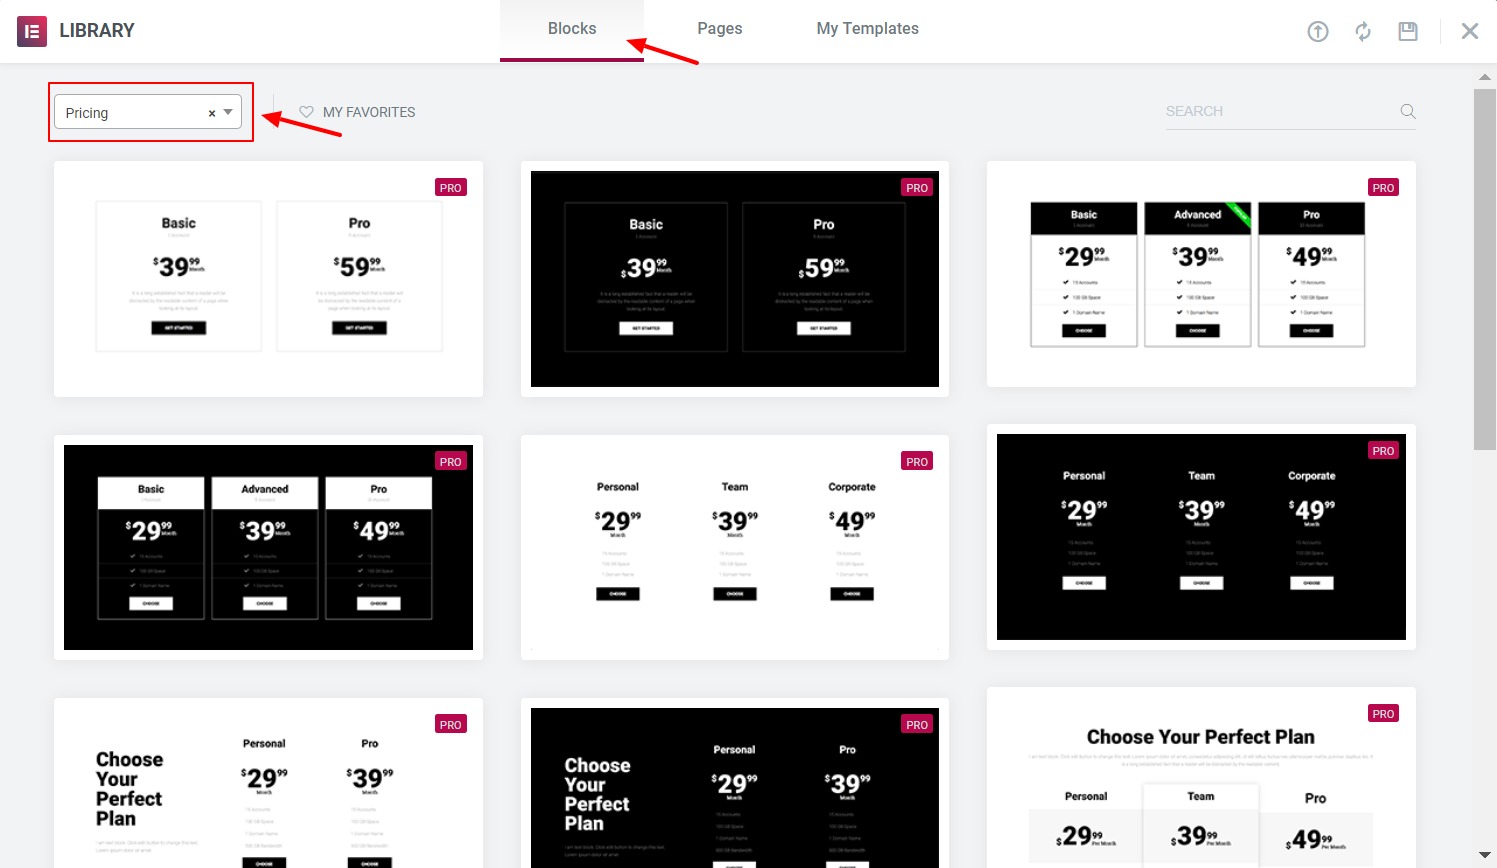
Step 3: Now you will be presented with multiple pre-designed templates. Go to the Blocks tab and select the category as Pricing and choose the desired template to preview and click Insert to add it to the page.
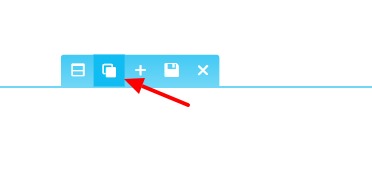
Step 4: Now as we need to design two different Pricing Tables for toggle (Monthly and Annual Plans), go ahead and add another pricing table on the page by repeating the above step or click on the duplicate icon on the current row.
Step 5: We will start editing one Pricing Table at a time. Select the leftmost table of the first table group to show its properties.
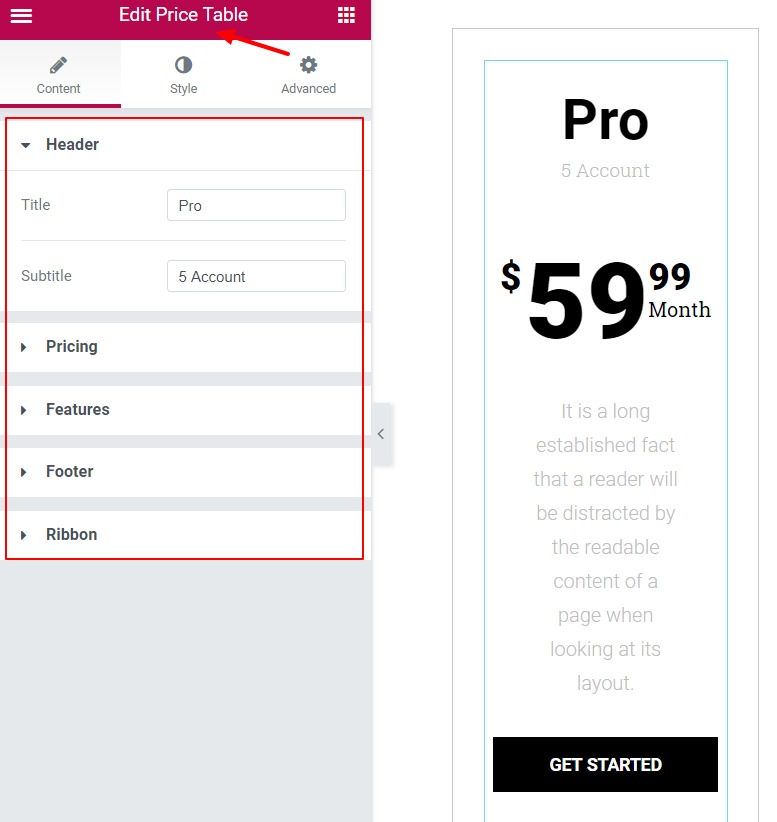
Step 6: Change the Title, Subtitle, pricing, features and other contents as required in the content tab. You can enable/disable ribbon too for your featured plan as well. Add the respective link on the button link under the footer sub-category.
Step 7: Now it’s time for designing. Move on to the Style tab and make the changes there. You can change the color, typography, padding, size, positioning, alignment, etc. to the table from this tab. This is what the table looks like after making the changes.
Tip: Design your best performing plan in a way that it stands out and catches more attention.
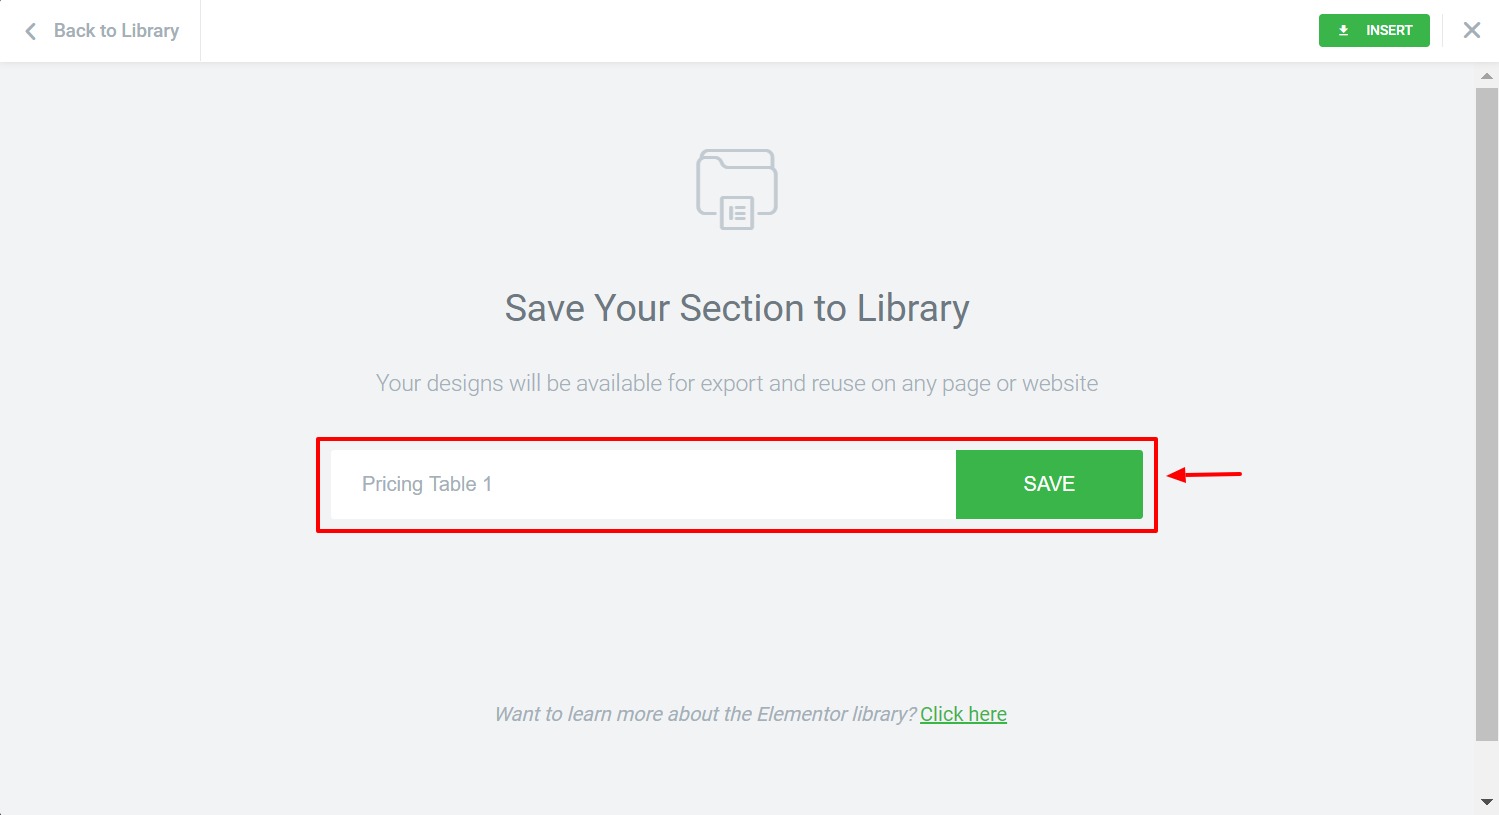
Step 8: Repeat the same steps for the other two pricing table cards. Once you have done that, click on the tables’ row and click on the Save Section button at the top. Give your section a proper name and click on the Save button. We will be using this saved row later in toggle button.
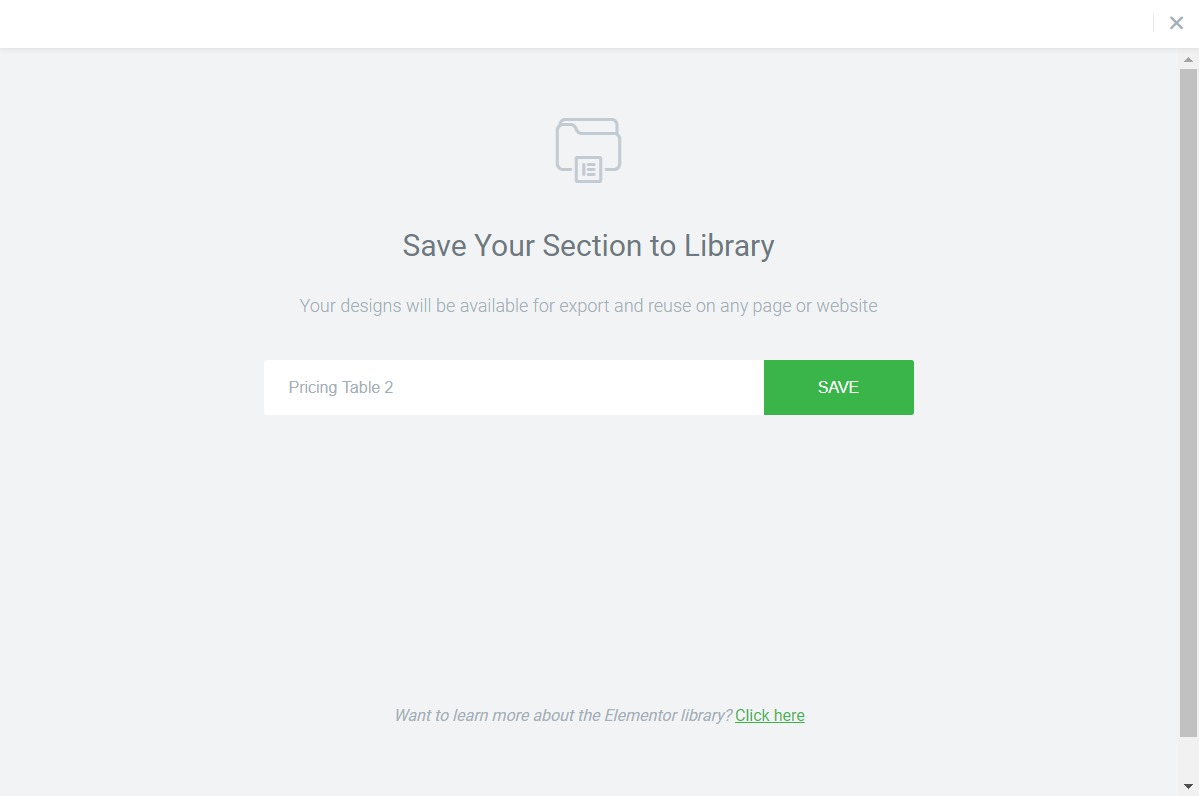
Step 9: Now its turn for the second pricing table group (Annual Plan). Do the editing and changes we did earlier but remember this group is going to be for the annual pricing plans and you will have to update the details there accordingly.
Also, make sure that you keep the design of this group in contrast with the previous (monthly) group as you would want your users to notice the change when they toggle. If you keep both groups’ design identical, there is a possibility that user might not be able to see the difference in details.
Step 10: Once you have made changes to the second group of pricing cards, click on the save icon and give it a proper name.
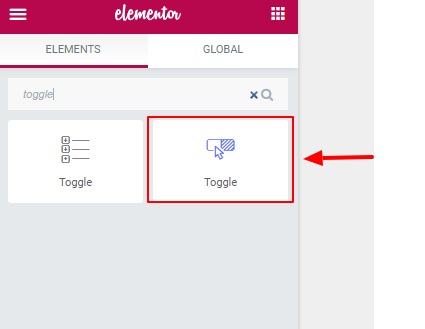
Step 11: Now since you have both the Pricing tables ready. It’s time to connect them with the Toggle widget.
Go to your pricing page and add PowerPack’s content toggle switch on the page.
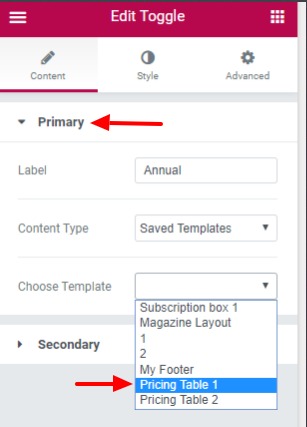
Step 12: Its time to link the two saved templates. Go to Toggle settings > Primary. Select the content type as Saved Template and then select the monthly row (In this case, Pricing Table 1) which you saved earlier.
Also, change the Label Name accordingly.
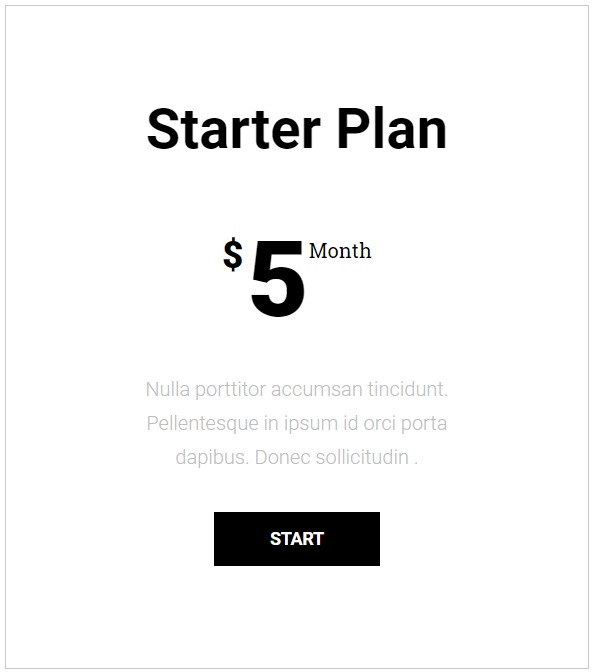
Step 13: Do the same for the second sub-option under Toggle settings and select the second (yearly) row and change the label to Yearly. You can also make changes to the toggle design and the way it looks from the style tab. This is what the toggle witch looks like after making the changes.

Step 14: Go ahead and click on the Publish button to make the pricing page live.
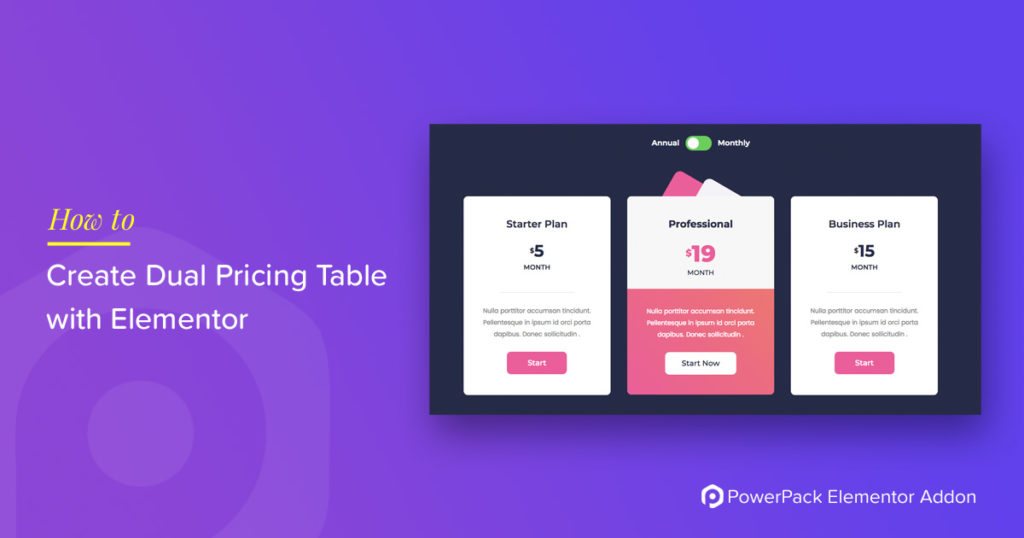
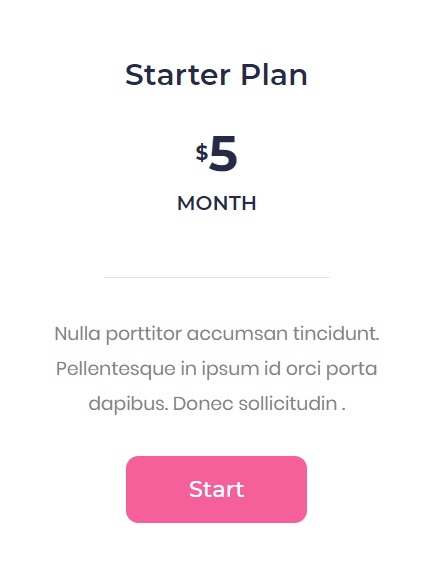
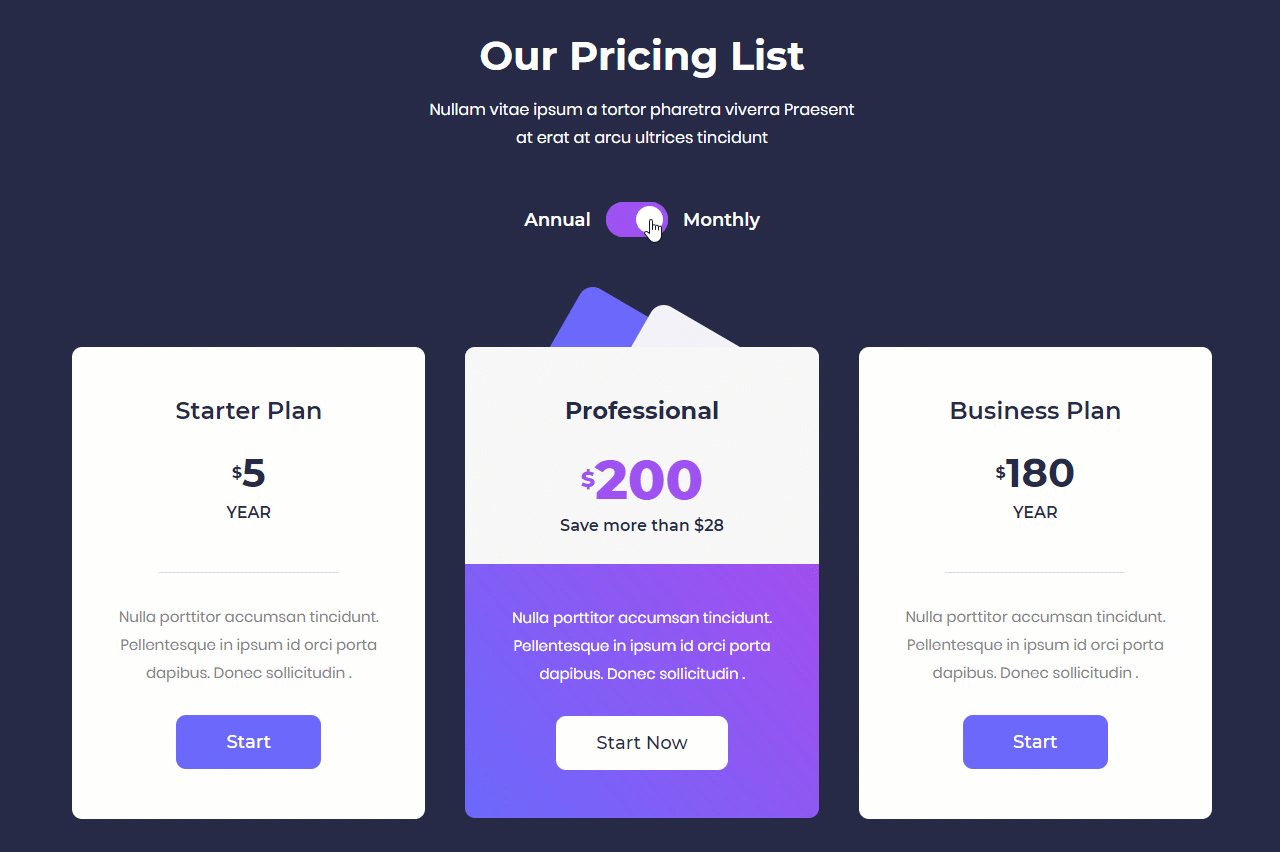
This is what the toggle pricing tables looked like when published.
Summing it up!
You can use the same layout for displaying yearly/ lifetime packs or even comparing two different packages. You can take a look at more creative examples of using the Content Toggle Widget here. If you do not have PowerPack, Get it here.

7 thoughts on “How to Create a Variable Pricing Table with Elementor?”
This is awesome! Love it. I have been looking into how to create different pricing pages… This might help!
Hi,
Does the plugin have a tooltip option?
Thanks
Hi Mario,
We currently don’t have a tooltip option. It’s on our list for the next update.
Thanks!
hi is there a way we can set different prices for different countries ?
Hi Ben,
Sorry, that’s not possible.
Hello Puneet
Thanks for such an amazing tutorial. In addition, I am looking for a way for users to switch currency within the pricing box, For example, the default currency is USD and I want for users to have an option to see price in GBP and Euro.
Thanks
I am sorry, we don’t have an option for switching the price. You will need to look for some jQuery method to get it working 🙂