Contact form is a vital component for any website, and adding it on website enhances its appearance and make it look more professional to your visitors.
Having a contact form on a website helps in generating leads, reducing spam & keep your site secure.
Thanks to WPForms plugin, one of the best drag & drop form builders. It helps you to design a contact form, donation forms, order forms, and other working forms on a WordPress website. You can easily create an amazing contact form, or you can choose from the hundreds of pre-built form templates.
In this post, we will see how you can create and style a contact form using WPForms widget for Elementor
Style WPForms with Elementor
If you would prefer to watch a video, you can Check Here.
First, you need to activate & create a form through WPForms plugin. For this, you can check out WPForms documentation to get started with WPForms.
Once you create a form, we can go to the all customizations & styling options of the contact form.
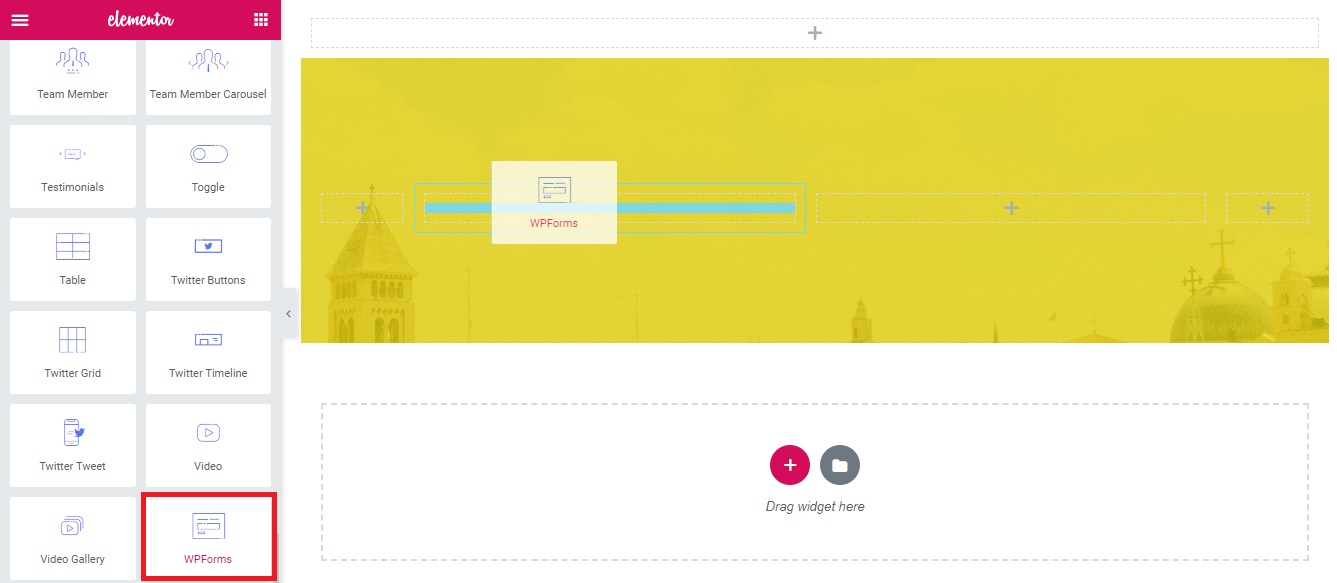
Open a page in elementor editor. Now drag & drop WPForms widget in the “Drag widget here” section.
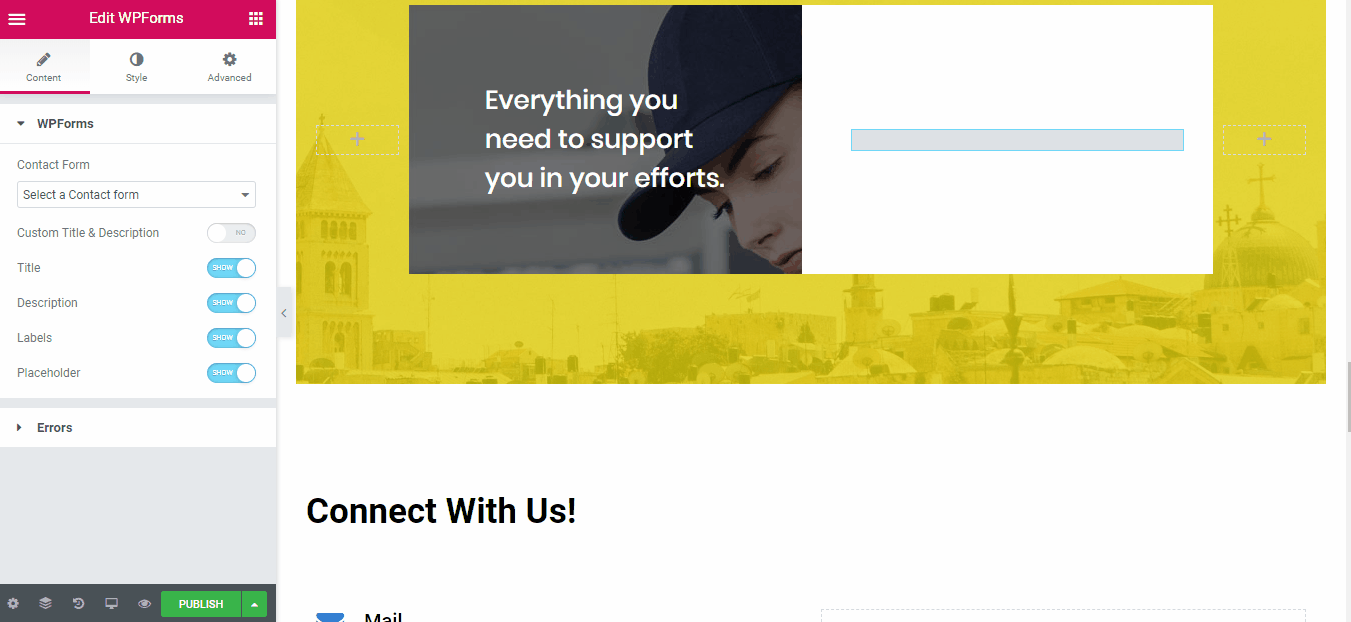
WPForms widget for Elementor: Content Tab
First, you need to select a form from the drop-down menu. As soon as you choose the form, it will appear right away on the editor.
WPForms:
As you saw, the above contact form has default settings. With WPForms Widget for Elementor, you can style & customize these settings, & make it look more attractive.
You can add Eye-Catching Headline with Custom Title & Description.
Apart from this, you can also Enable or Disable Labels, Texts, and Placeholders.
Error:
In case anything goes wrong while submitting the Contact Form, you can easily display an Error Message to your users from this section.
WPForms widget for Elementor: Style Tab
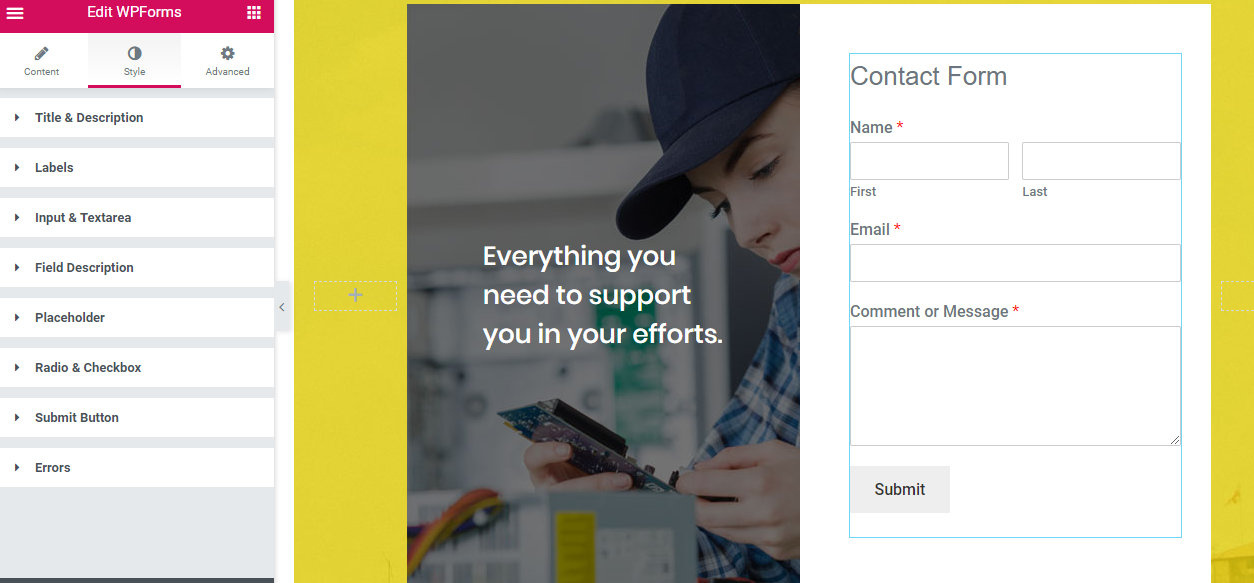
From Style Tab, you can change the look and appearance of the Form. Here you can style Text Area, Labels, Radio Buttons, Checkboxes, and Submit buttons.
It also allows you to change Text Color & Typography of the Title & Description, Labels, and Placeholder. Moreover, you can change the alignment of the background & text color.
You can also add custom styling to the Radio Checkbox Button in your Form.
Additionally, you are allowed to style Submit Button & Error Messages as per your preference.
Styling options for Input & Textarea:
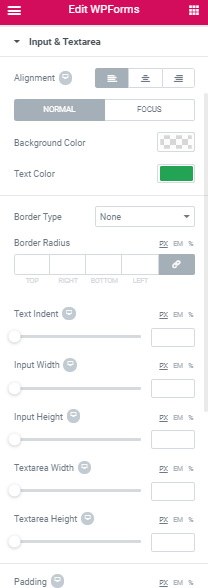
Text input fields are the most common elements of the contact form. With WPForms Widget, you can easily style input & text filed area.
You can set Background & Text Color for the input areas.
Also, it gives you the flexibility to adjust Input Text Indent, Width & Height as per your preference.
Customize Radio & Checkbox Button:
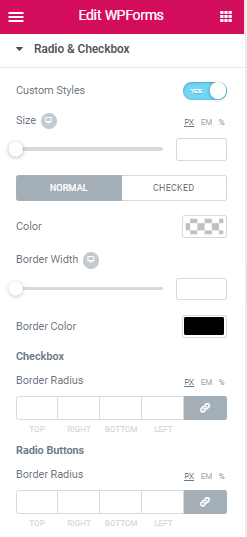
This widget also allows you to add custom styling to Radio & Checkbox button of the contact form.
For adding custom style, first, you have to enable the Custom Styles button from Radio & Checkbox section.
You can choose custom size & color for the checkbox button. Choose a border-radius for both Radio & Checkbox button to make contact form more attractive.
Add Custom style to the Submit Button:
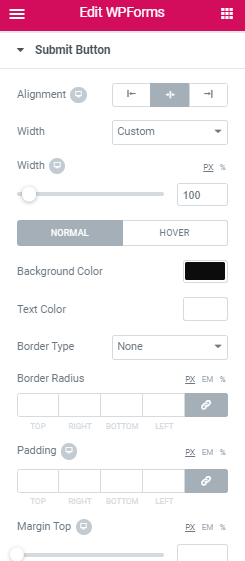
Submit button is the essential component contact form. It helps you to collect your user’s information. If you would like to change & customize submit button settings you can easily do with WPForms widget.
It allows you to add impressive style to submit button that fit your site’s design & appearance.
Here you can select text & background color. Choose border type for the box and for adding more styling, you can give a little box-shadow & padding.
Moreover, you can customize typography & add border-radius as per your preference.
Style Error Messages:
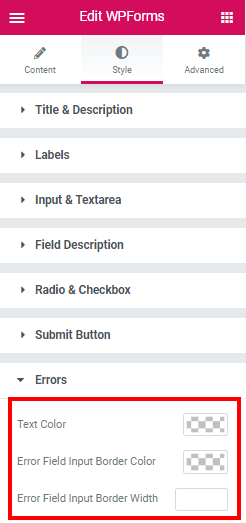
With WPForms widget, you can not only display error messages but simultaneously you can add styling to it.
You can add text color and can easily customize Error Field Box for highlighting error messages to the users.
Here I change typography for each text content and giving a little box shadow for highlighting the boxes. Also, I added a little padding & margins to the elements so that the form won’t look compact.
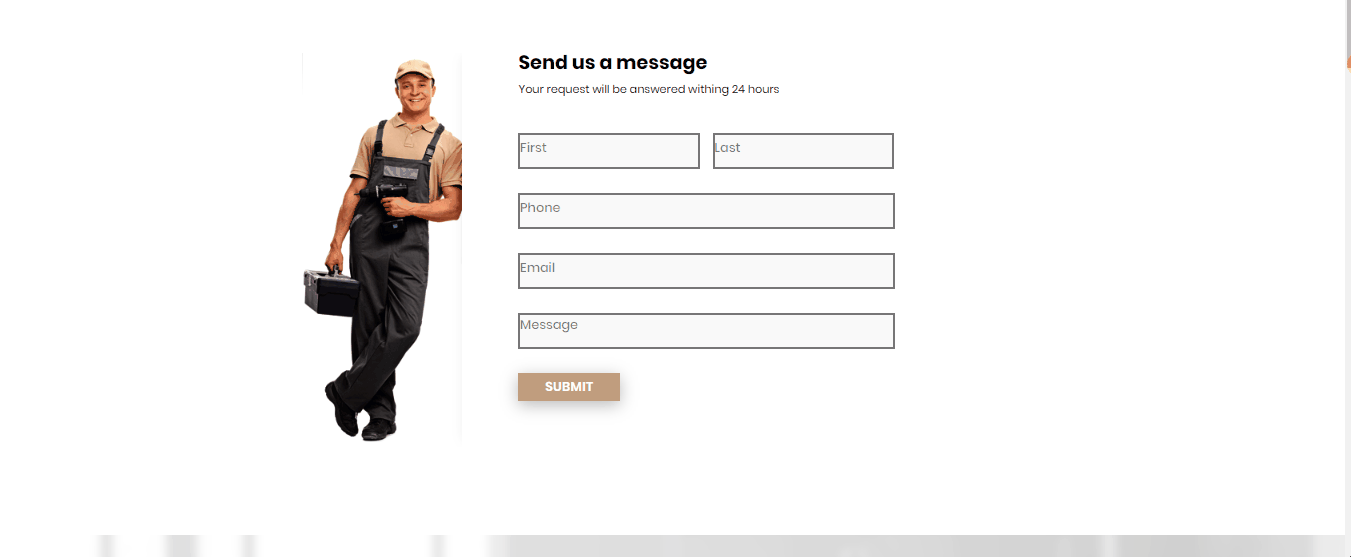
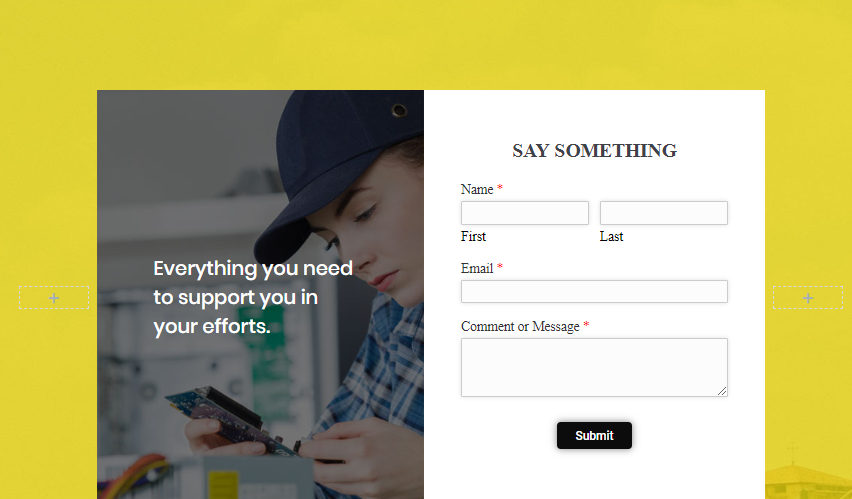
Final Outcome:
After making all the changes, this is how the final design looks like:
Here are some more impressive designs of contact form made with Elementor